Showing posts with label Layout. Show all posts

Saturday, 6 June 2015

My Crush Blog Hop


Welcome to the My Crush Blog Hop, this is our additional hop put on by the SOTM Blog Hop Group.  This month Close To My Heart has an awesome promotion featuring the My Crush albums, Summer CrushDuring the month of June, when you purchase any My Crush® book and its accompanying assortment pictured in Annual Inspirations 2014–2015, you will receive the coordinating stamp set FREE! That is a savings of at least $9.95 USD / $10.95 CAD! Choose from five lovely My Crush book offerings that will provide a swoon-worthy background for your favorite memories. From family reunions to camping adventures to holiday countdowns—and much more—you will be crushing on all these books and the possibilities they provide. Every My Crush book features a hard cover with wire binding and cardstock-weight pages that are printed with eye-catching designs to form the perfect bases for your memory keeping. Additionally, each My Crush book also features unique details—from glossy print, to vellum pages, to gold foil, to ink-resistant patterns—that make displaying your personality easier than ever. Plus, once you add the artistry of the coordinating assortments featuring sticker sheets, envelopes, alphabets, cards, and journaling spots, along with your free stamp set, you will be well on your way to your own gorgeous mini book creation!


For this Blog Hop we have 32 consultants participating, and we have many amazing projects to showcase for you.  If you have come from the fabulous work of Melissa than you are in the right spot. If you get lost along the way head on over to Melinda's blog and you will find the full list of participates there.

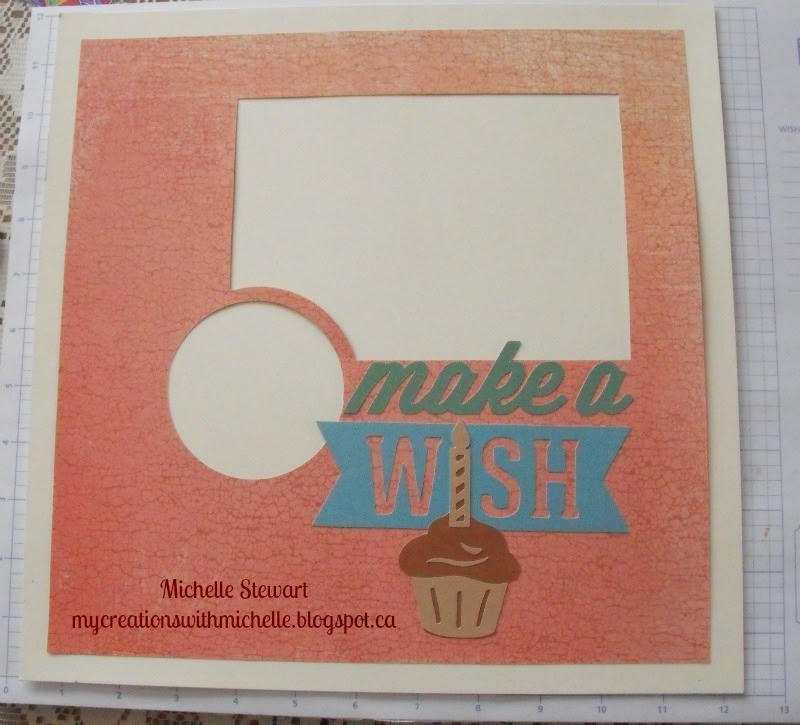
For my project, I decided to create a memories book for my husband and I.  I started by pulling out a few photos, and just started adding mementos and journaling to the pages. I'm featuring 3 2 pg layouts that I have created. The Crush book I choose is In The Pink(Z2000).


 The word "dream" is part of the page, I then stamped out "I had a" using the Handwritten Print stamp in black ink.  Using a journal spot from the My Crush In the Pink Assortment I finished the statement. On the second page I stamped at the top "You Are My Happy" from June's SOTM in black ink.  I added some White Sequins from the Coral collection and stamped the M size stamp "Sweeter With You" in White Dasiy Pigment Ink and heat set it with Embossing Powder.


 The first of these pages, I used Jouraling card from the Balloon Ride PML set, and added a stamped imaged from May's SOTM "Enjoy the Moment".  The second page, I matted the photo on a piece of cardstock from the Basic Fundamentals Assortment.  I then used the hoodstooth clip from the In The Pink Clip collection to hide some extra journalling.


I added some doodling just for fun. I really love how easy it is to put these pages together.


The first page I stamped some journalling lines a stamp from Documenting Moments stamp. I created a pocket behind the photo of the BioDome so that I could slide the ticket stubs.  For the second page I used an envelope from the In The Pink Assortment to hold the concert tickets.  I stamped "Life Is Grand" also from the Documenting Moments stamp using the masking technique in Cotton Candy and Black Ink.  Then I added a tab from the In The Pink Sticky Tabs.

I hope you enjoyed my pages, and that I've inspired you to create your own memories Crush album.  Now head on over to Melinda for some more fantabulous artwork.

Friday, 15 May 2015

May Cross Canada Blog Hop - Scrapbooking with How To Books

Welcome to our May Blog Hop featuring Jeanette’s How –To Books for scrapbooking.  To purchase any of the items seen in our blog hop today, contact your local consultant to place an order.

We hope that you will take the time to leave comments on our posts, as we love to get feedback from our viewers....whether it was something that you really liked or some new technique that was used that you would like to learn how to do....by leaving us comments, we get to hear what you like, and what you want to see. Thank you… now on to our hop! 

If you have just hopped onto my blog, you can start here as this is a circular hop, but if you want to follow us across Canada then please start at the beginning and join Deanne in Newfoundland.  Deanne also happens to be before me, so if you are joining me from her post, you are moving in the right direction.

For my layout I chose to follow a cutting guide from Make it From Your Heart Volume 1.  The layout is #8 found on page 20.  

I used The Seaside Paper collection, along with some aqua dots and the Seaside Assortment to embellish the page.  I used stamps from the Workshop along with the stamp Treasured Friendship (C1594). This layout will hold 3 photos. Below are closeups of each page.


Your next stop on the Cross Canada Hop is Rosalynd so hop on over and see what she has prepared for you.

If you get lost you can come back and visit me, as I am providing you with the whole blog hop list.
  1. Deanne
  2. Michelle
  3. Rosalynd
  4. Nicky 
  5. Arlene 
  6. Krista 
  7. Sheri  
  8. Lucy
  9. Brae 
  10. Cheryl 
  11. Jessica 
  12. Christine 
  13. Janet 
  14. Heather
  15. Kirstin 

Thanks for hopping along with us - we hope we were able to inspire you to get creative using some of the designs, products and techniques seen along the way. We hope you will join us again next month when our theme is Mini albums.  So mark June 15th on your calendars and hop along with us.


Thursday, 8 May 2014

Free To Be Me Blog Hop with Team Brae-er

Welcome to my Brae-er Team Blog Hop- since May is National Scrapbooking Month we decided to feature some really fun and useful techniques for scrapbooking! On this hop you will find tutorials and maybe even some videos!  Just follow along with the links.

Here is the paper packet:

If you came from the amazing artwork from Chris then you are in the right place. Unfortunately my photos didn't get developed as they were having issues with the machine, so I never got to finish my layout.  However, I wanted to share with you what I did get finished.


Keep hopping along as there is more fabulous creations from our team.  Your next stop is Kimberley, so sit back and let the creative styles inspire you.


Tuesday, 15 April 2014

Cross Canada Blog Hop - Artbooking in April

Welcome to our April Blog Hop featuring creations made with our latest Cricut Cartridge, Artbooking.  To purchase any of the items seen in our blog hop today, contact your local consultant to place an order.

We hope that you will take the time to leave comments on our posts, as we love to get feedback from our viewers....whether it was something that you really liked or some new technique that was used that you would like to learn how to do....by leaving us comments, we get to hear what you like, and what you want to see. Thank you… now on to our hop! 

If you have just hopped onto my blog, you can start here as this is a circular hop.  I am also the first stop on your hop across Canada, we hop from East Coast to West Coast, so I hope you will hop along with us. There are 15 participating in this month's hop. If you came from Candra's Blog Paper Dragon Fleur then you are in the right place! 

This layout is super super cute and easy and with a change of colors will fit a boy or girls birthday.  All the cuts were found on page 87 of the Artbooking handbook. Just 5 simple cuts,and add your photos and BAM, layout complete.  You can choose to embellish it further or leave it plain. What is great about this cartridge is that once you set you dimensions to 11" all cuts will cut to coordinate for that page. How awesome is that, this cartridge takes all the guess work out of figuring the sizes.  My pattern paper is from the Balloon Ride paper pack, and all my colors were chosen from the colors in this paper package.


For this cute Easter card, I used a Photo mat found from the same page to add a border.  This just goes to show that the Artbooking cartridge can be used for everything from layouts, to embellishments, borders and tags.....I could keep going on....but I think you get the idea. So continue to hop along and get more inspiring ideas from the creations from our Creative Canadian Consultants.

Your next stop on the Cross Canada Hop is Nicky of Timeless Cottage.
 If you get lost along the way, you can head back here to my blog, as I have provided the complete list of our participants.
  1. Michelle ~My Creations With Michelle
  2. Nicky ~ Timeless Cottage
  3. Arlene ~ Arlene's Creative Space
  4. Krista ~Simply Creating
Thanks for hopping along with us - we hope we were able to inspire you to get creative using some of the designs, products and techniques seen along the way. We hope you will join us again next month when we will be featuring Home Decor projects.  So mark May 15th on your calendars and hop along with us.

Tuesday, 18 February 2014

Friendship Layout with Artbooking

So, I have a scrapbooking class coming up on Friday and I've got my layout complete except for adding the photos.

I've used the artbooking cartridge to create this layout, and all the cuts are found on page 78.  You might even recognize this layout from one very similar found on an episode of Artbooking Made Easy.  I started with Slate Cardstock as my base, and then added a White Daisy Mat spritzed with Blush Re-inker.  Then added the overlays.  The large photo frames are 4x6 and cut from Soothie, and the film strip frames are cut from Lagoon, and will fit 2x2 photos.

The remaining cuts can all be found on page 78, from the flourish cut in Whisper to the Friends Forever Brackets cut in Crystal Blue, and the flowers are cut from Blush Cardstock. The finishing touches are Juniper and Silver Washi Tape.

So here is what I've come up with.

I hope you like it.  I know I can't wait to add photos of my girls to complete this layout. If you would like to attend any of my classes please contact me here. If you would like to purchase your own copy of the Artbooking cartridge you can shop now on my website, or you can host a party, and if your party reaches $250 or more, you can earn $40 in Hostess Rewards plus 1 item at 50% off which includes any of our 3 cartridges.

Tuesday, 21 January 2014

Christmas Studio J layouts

As promised I'm back today with my layouts from my family Christmas celebrations.  They were super quick to put together.  Just choose your paper, and layout, upload you photos and start placing all the pieces together.

This is for in Abbigail's album

This is for Nicholaus' album

This is for Jaymee's album

This one is for my family Christmas album

Well that is it for this post, but tomorrow I'll be back with my post for Atlantic Hearts Sketch Challenge.


Monday, 20 January 2014

Studio J makes Scrapbooking super Easy

So you know how life gets in the way and you don't get to scrapbook those family photos that you just had done?  You keep saying, I'll get to that tonight, or maybe over the weekend. There is not excuse for me, I'm a stay at home mom, I have all the time in the world right?  Nope, I still didn't get around to scrapbooking my fall family photos until after Christmas.  I used Close to My Heart's Studio J program.

I was able to pull any paper packet I wanted and choose my layout.  If I wasn't happy with my colors, they I changed them.  It was really so very easy to do.  With embellishments at your fingertips I was able to add embellishments and change the size and color aswell.  Journalling was just as easy, choosing script, color and size was a snap.

For only $6.95 for a two-page, custom-printed layout (including JPG files),  and only $13.95 shipping to Canada with a minimum 4 two-page layout. (max. 50)

There is no downloading of software, and you can create a customer account that allows you to save and return to a project in progress at a later time. Your active projects will be saved for up to 90 days, giving you plenty of time to work on them. You can extend that timeline for your active projects by 90 days each time you make a purchase, and your purchased projects will remain archived for one full year after purchase. We’ll email you when your active projects are set to expire so you can be sure to purchase them before they are deleted. 

Well, here is the layout for my Family Photo Shoot, and check back tomorrow to see the layouts I created from our Christmas celebrations.


Friday, 15 February 2013

February Blog Hop - 2 page layout


Welcome to our February Blog Hop featuring a 2 page layout. This is the first Blog Hop for us where we have featured just scrapbook layouts. We hope that you will take the time to leave comments on our posts, as we love to get feedback from our viewers....whether it was something that you really liked or some new technique that was used that you would like to learn how to do....by leaving us comments, we get to hear what you like, and what you want to see. Thank you… now on to our hop! 
One of our Crafty Canadian Consultants is running a contest, so hop on through and don't forget to leave comments.....
I am the first stop on this Blog Hop, but if you have come from Michelle M's blog Twirl N Time then you are in the right spot as this is a circular hop.

Treasured Tags layout from Cherish How to Book

For this layout I used the New Claire Paper. I really love the colors. This layout is featuring pictures of my youngest at her first birthday party....she really loved her cake.


I used Blush Cardstock as the base for my layout, and used Cotton Candy, Outdoor Denim and Ruby Cardstock for my accents aswell as the first sheet of paper in the Claire paper packet.


The embellishments are mainly the shapes cut from the bold pattern of Claire and I added Liquid Glass to them to make them shine. I layered the flower by cutting out each different section of this flower.


This next photo I used the Rosette Ribbon as some added detail to soften the layout.


This next photo I've wrapped some Baker's Twine from the Paradise collection, and tied a knot to add a little dimension.


Here I've journaled using the Chalk Board Marker. The Cardstock is distressed using the sanding block.


Using the Chalk Board Marker I've added stitching and doodling to the edges just to finish off the look.


Your next stop on the Cross Canada Hop is Stephanie of Stephanie's Creations.


Below you will find the entire blog lineup, just in case you get lost along the way.
  1. Michelle ~ My Creations With Michelle You Are Here 
  2. Stephanie ~ Stephanie's Creations
  3. Nicola ~ Timeless Cottage
  4. Arlene ~ Arlene's Creative Space
  5. Joanne ~ Jag's Scrappin Corner
  6. Carrie ~ Scrappin With Carrie
  7. Krista ~ Simply Creating
  8. Sheri ~ Sheri says-just scrap it
  9. Brae ~ The Brae-er
  10. Carol ~ Welcome to CraftyCarol's Place
  11. Heather ~ Creative Coconut
  12. Teresa ~ Country Crafting Mama
  13. Cheryl ~ Scrapbooking with CTMH
  14. Terry Ann ~ It's my Garage--I Can Craft In It!
  15. Janet ~ Jan's Works of Heart
  16. Kathy ~ IT'S A GIRL THING!
  17. Famida ~ Get Scrappin With Fami
  18. Chantal ~ It's a Hoot Papercrafts
  19. Nancy ~ Nancy Klein
  20. Candra ~ Paper Dragonfleur
  21. Michelle M ~ Twirl N Time


Thanks for hopping along with us - we hope we were able to inspire you to create your own scrapbook layouts using some of the designs and paper seen along the way. Join us again in March when we will be featuring our new 5x7 Hinged Display Tray.

Friday, 6 July 2012

Super Hero Layout/Nicholaus(3)

My son Nicholaus who turned 3 this year decided that he would make his appearance on his sister's 5th birthday.  The pictures I used in this layout are from our spring photoshoot to celerbrate my children's birthdays.   Nicholaus is my everyday superhero, he has enough energy for all 3 of my kids, and he is always one superhero or another, whether he is Superman, Spiderman or Optimus Prime....he is always running around ready to fight off the bad guys and keep his sisters safe.  


I used the layout Easy Inspiration from the Cherish How-To Book, I rotated the layout, and made a few changes, and added my spin to the layout.  


The first page, I took 4 dimensional stars and Inked 3 solid in Honey, then with the largest star, I used a decorative stamp from The Best Things stamp set also in Honey.  Nicholaus is stamped using the Urban Alphabet in Outdoor Denim.  The 3 is inked in Black after I cut it from my cricut.


Instead of placing a photo in the Red block, I decided to use it to journal, and I added a Superhero Badge Button.  Then on some Colonial Scrap paper I took the stamps from the Superhero workshop stamp set and stamped the spiky balloon in Indian Corn Blue using 2nd generation stamping, then added the WOW in Holiday red, I then outlined the balloon using the Moonstruck marker, and the WOW using the Cranberry marker, then trimmed it out.  I then added some liquid glass to the WOW to make it pop up and shine a little.  To give some dimension I used 3D tape to adhere it.  The mats for the photos I used the Distresser to rip away the edges.  

I really like how it turned out.  I added some strips of paper here and there just to add some more detail, but the layout is pretty easy, Easy Inspiration from Cherish.

If you like this layout you can still buy the superhero paperpacket, rub-ons, stamps, badge buttons and workshop until the end of July, visit my website and purchase these or other workshops before they retire.  You can find everything I used in our current Idea Book, shop now!